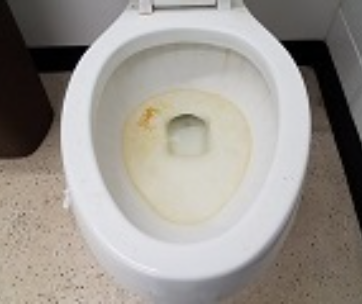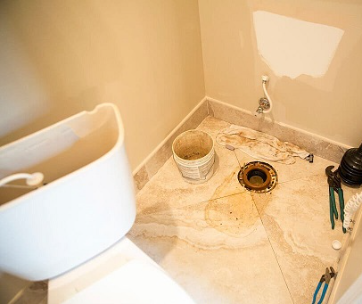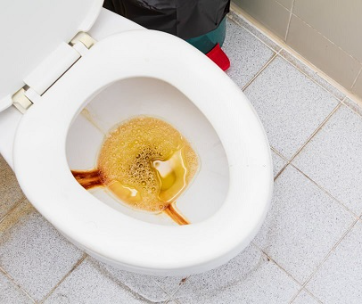

Toilet tiles are bound to discolor and stain over time especially if they are not well taken care of. Water stains, grime, mold, mildew, and in some cases soap scum, are often the major culprits for a dirty-looking bathroom.
Mold and mildew growth is likely to happen around the toilet flange, bathroom cove joints (baseboard), or in the grout grooves. This can be further exacerbated if your toilet is poorly ventilated and has high humidity.
Tile discoloration and staining may also be caused by the daily exposure to water and dirt as well as the prolonged build-up of soap scum.
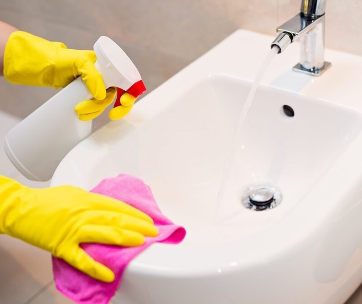
Ultimately, the best way to maintain your toilet tiles and bathroom is to ensure they stay clean. Plus, try to avoid using harsh chemicals for cleaning. Strong tile cleaners and bleaches not only compromise the life of your toilet tiles but also pose health and environmental risks.
Natural vs Chemical Toilet Tiles Cleaners
In general, most household cleaners contain chemicals that might be harmful to the environment and your health. Some of the components may cause skin and eye irritations, respiratory infections among children aged 6 to 12 years old, or adverse reproductive effects.
Surfactants used in most cleaning products decompose slowly or biodegrade into persistently toxic compounds that can be toxic to aquatic life. Additionally, the chemicals can easily damage or eat away the sealant on your toilet tiles.
With that in mind, natural tile or general cleaning products are the way to go for a healthier you and a healthier planet.
Natural cleaning solutions are biodegradable and contain low quantities of volatile compounds. They are more energy-conserving and less pollutant as you can make them at home.
Organic tile cleaners contain fewer allergens, unlike store-bought cleaning products. You won’t need to deal with dyes, sulfates, perfumes, chlorine, caustics, ammonia, formaldehyde, or gluten, which are known to cause respiratory irritations.
They are gentler on the skin, affordable to make, and will protect your family and pets. Furthermore, organic tile cleaners are perhaps the best way to help you stay in or complement your organic living lifestyle.
However, do keep in mind that most of the natural cleaning solutions aren’t as effective as your typical “chemical” cleansers. Plus, cracking the right recipe for your needs can be a lengthy process of trial and error.
Getting Started
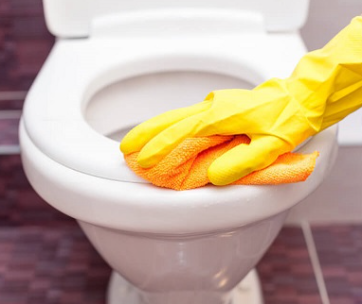
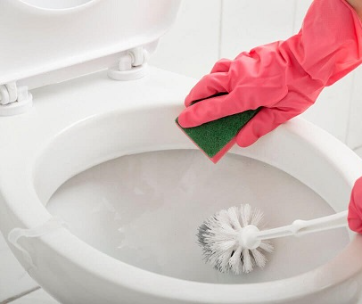
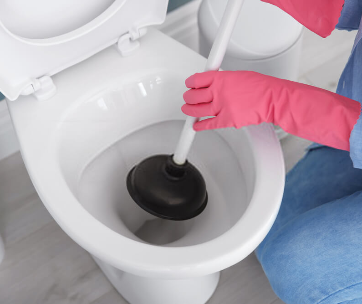
Aside from the active ingredients, you will need some basics such as empty spray bottles, glass jars, microfiber cloths, a non-abrasive sponge, a soft-bristled cleaning brush, a squeegee, a pair of protective rubber gloves, and a steam cleaner.
The bottles come in handy for storing liquids while the glass jars will be perfect for keeping the powder-form tile cleaners. You can use an old toothbrush if you don’t have a soft-bristle brush at hand. Be sure to have some warm or hot water nearby as it greatly helps with the cleaning process.
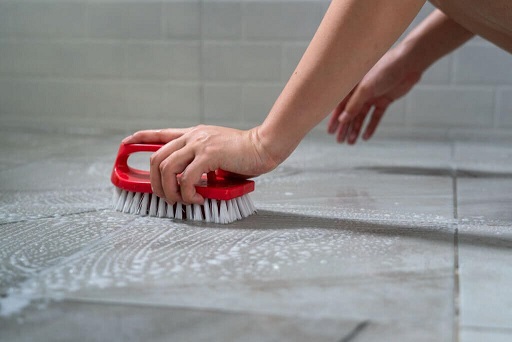
Having a step-by-step process for cleaning your bathroom floor makes everything a lot easier and more efficient. First, you want to clear any items that might get in the way of you cleaning the floor. Remove any mats, toilet stools, or other objects for the best cleaning experience.
Secondly, you want to remove any dust and loose dirt on the floor with a broom. This helps avoid clogging the drain with muddy water and makes the thorough cleaning a little easier. Proceed to clean the floor with either of the organic solutions mentioned below.
Remember to rinse the floor and squeegee the water down the drain. Here, a spin mop should do the trick too. Lastly, consider drying off the floor with an old towel or cloth to prevent the growth of mold or mildew.
Best Organic Toilet Tiles Cleaners
Some of the most common types of bathroom tiles include natural stone, ceramic, porcelain, linoleum, vinyl, and glass. Natural stone tiles branch further into variants such as slate, limestone, granite, marble, onyx, soapstone, travertine, and granite.
Different types of tiles and levels of dirt will require specific cleaning techniques and cleaning products. Although we’re going the organic route, some of the ingredients might be destructive to some types of bathroom tiles.
Cleaning solutions containing vinegar, ammonia, lemon juice, or other acidic components are not suitable for use on natural stone or wood tiles. They will cause etching, breakdown of present sealants, and ultimately cause discoloration on these types of tiles.
Be sure to test your organic cleaning solutions in a hidden spot before cleaning the rest of the bathroom. Not to worry, we will include disclaimers on what works best for various types of tiles.
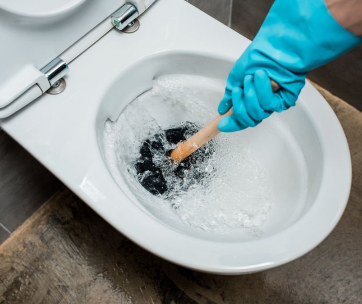
1. Steam Cleaning
This chemical-free method combines heat and pressure to loosen caked-on mold, grime, soap scum, and grease from your tiles. Steam cleaning works with most types of tiles and can help restore grout lines.
You won’t have to scrub the floor excessively as the steam gets right into the hard-to-reach crooks and crannies of your flooring. It can be done with either a steam mop or splashing hot water on the dirtier spots in your toilet.
What You Need
- A steam cleaner
- Brush attachments for grout cleaning
- Water
Instructions
Fill the steam cleaner with water and turn it on with the steam setting on. Or, follow the included instructions from the manufacturer.
It is highly recommended that you first clean the loose dirt from the tile using a mop and soapy water. Else, the loose debris might clog your steam cleaner. Then, steam up the stained sections on the tiles before working on the grout lines.
Attach the appropriate brush as directed by the appliance’s manual. A soft nylon-bristle brush should do the trick for most grout without damaging the tiles. For more stubborn stains, a brass-bristle brush should work out just fine but may etch into some tile types.
Turn on the cleaner once more and adjust the spray rate as desired. Use vigorous back-and-forth motions to scrub the grout until it’s clean. We advise working on a small section first before moving to the next.
Rinsing the section and mop after a few scrubs is necessary to prevent the dirty water from settling back in the grout. Refill the steam cleaner as needed then scrub, rinse and repeat until you’re satisfied with the results.
Wipe the surface clean with a microfiber cloth.
2. Dish Soap or Castile Soap
Keeping things even simpler, mild dish soap or Castile soap can be sufficient for cleaning your toilet tiles. Always go for mild liquid soap without any bleach, moisturizer, or other additives as that might be counterintuitive to our all-natural-cleaners goal.
Castile soap is a vegetable-based soap that’s made free of synthetic ingredients and animal fats. Though primarily made from olive oils, Castile soap is also made of castor, coconut, avocado, walnut, or hemp oils.
Both soaps work wonders for mild stains and can even be used to clean natural stone tiles. Most mild soaps and Castile soaps have neutral pH levels so you can rest assured they won’t damage your tiles. The soaps naturally lift dirt and grease making them ideal for spot treatment and general cleaning.
What You Need
- 2 cups of water
- ½ teaspoon of Castile soap or liquid dish soap
- Optional: ½ cup rubbing alcohol
Instructions
Mix all the ingredients in a spray bottle and store it away for a week or two.
Shake the mixture well before use. Remember to spot test the cleaning solution in a small discrete area before spraying it elsewhere.
Alternatively, you can mix a ¼ cup of Castile soap in a bucket of hot water for immediate usage. Wet a chamois mop or rag mop in the cleaning solution and mop the toilet tiles. Mop again with clean water to rinse the floor and remove any soap streaks.
Disclaimer: Don’t use Castile soap on waxed wood floors as it tends to break down the wax.
3. Salt Scrub
Removing mold, limescale, and rust stains are perhaps best done using a saline scouring solution. Salt acts as a mild disinfectant and can kill some types of germs and bacteria. It does so by sucking water out of them through osmosis.
However, there are other much more effective disinfectants out there. So, consider using a saline solution mainly for its scouring and dirt-dislodging properties.
What You Need
- Coarse salt or Epsom salt
- Soft-bristle brush
- Hot water
- Damp cloth
- Optional: baking soda
Instructions
Mix equal parts of the water and salt to make a saline solution. You may add a dash of baking soda if dealing with more stubborn stains.
Apply the saline solution to the tile surface and grout lines using a cloth or a soft-bristle brush. Or, you can wipe the tiles with a damp cloth then liberally sprinkle the salt on the surface.
Leave the solution on the surface for an hour or even overnight then scrub it off with a brush. Keep in mind that the longer the salt stays on the floor the more effective it will be at stripping away the dirt and grime.
Scrub and rinse the tiles and grout lines with clean water until you’re satisfied with the results.
Disclaimer: If you have marble tiles, avoid cleaning them with salt as it may damage the surface.
4. White Vinegar
Vinegar is a safe pantry product that is very versatile and effective when it comes to cleaning our homes. Its acidity prevents the growth of mold, mildew, and some types of bacteria. In addition, vinegar is very effective at removing dirt build-up, water stains, mineral deposits, and soap residue.
Vinegar can either be used as a base for other natural tile cleaning solutions or used alone with soap and water. Save for baking soda, white vinegar can be mixed with salt, rubbing alcohol, borax, and so much more.
The claim of a vinegar/baking soda solution being a power cleaner might as well be an old wives’ tale. After all, mixing a base (baking soda) and an acid (vinegar) result in a mostly neutral salty solution (water and sodium acetate).
If you insist on the combo, don’t use equal parts of both substances. That way, you will end up with a basic or an acidic solution instead of a neutral one.
Another concern that might come up when making your vinegar cleaning solutions is its strong smell. Try covering your face with a face mask or bandana to help alleviate the problem.
What You Need
- Distilled white vinegar or apple cider vinegar
- Water
- Options: liquid dish soap (plant-based), salt, and rubbing alcohol
Vinegar with Dish Soap
Mix half a cup of distilled white vinegar per gallon of warm water in a spray bottle or bucket. You may add a tablespoon of liquid dish soap if there is significant gunk on the floor. Shake or stir the mixture to combine all the ingredients.
Spray on the tile surface and leave the solution to sit for a few minutes. Or, use a mop to clean the area with the solution. Remember to wring the mop as much as possible for the best results.
Rinse the area with clean water if needed, and let the floor air dry.
Vinegar and Salt
Mix equal amounts of hot water and white vinegar in a spray bottle or bucket. Add two tablespoons of dish soap and a cup of salt. Shake or stir the solution before using it.
Apply the solution on the tile surface and grout lines with a sponge or brush. Let it sit for at least 30 minutes, then scrub or wipe the area. Rinse the section and then wipe it down to dry.
Vinegar and Rubbing Alcohol
Mix equal amounts of rubbing alcohol, white vinegar, and water in a spray bottle or bucket. Add half a teaspoon of liquid dish soap.
Mop or scrub the floor with the solution and rinse as needed until the tiles are clean. Then wipe the area dry with a microfiber cloth.
Disclaimer: Don’t use vinegar on natural stone bathroom tiles as it can etch or discolor them. Never mix vinegar with bleach or hydrogen peroxide.
Mixing vinegar with bleach releases chloramine and chlorine gasses, which might cause eye irritations, coughing, burning, and breathing issues. Combining vinegar and hydrogen peroxide forms peracetic acid, which also poses considerable health risks. Instead, you may use vinegar and hydrogen peroxide cleaners in succession.
5. Baking Soda
This mild alkaline cleaner is also known as sodium bicarbonate or bicarbonate of soda. It is ideal for removing fungus growth, bacteria, and small amounts of dirt and product residue. The substance can also act as a mild deodorizer.
Its mild abrasive nature means that you can scour your tiles without worrying about scratching the surface. However, baking soda requires some more elbow grease than your typical household cleansers.
To clean with this substance, simply dip a damp sponge or cloth into the baking soda and scrub the affected areas on your floor. Alternatively, you can add liquid soap, vinegar, borax, or hydrogen peroxide to take care of the tougher stains.
Hydrogen peroxide and baking soda make for a very effective whitener and degreaser.
What You Need
- Baking soda
- Water
- Options: Liquid soap and hydrogen peroxide
Baking Soda and Liquid Soap
Mix equal parts of water and liquid soap, then add two parts baking soda. Pour the mixture into a tub container or a wide-mouth jar.
Apply the solution on the tile surface and grout lines and allow it to sit for a few minutes. This will allow the solution to fully dissolve the grime build-up.
Scrub the affected areas with a soft-bristle brush, old toothbrush, or sponge. Rinse the floor with hot or warm water and then wipe it dry.
Baking Soda and Hydrogen Peroxide
In a bucket, combine half a cup of baking soda, a quarter a cup of hydrogen peroxide, and a tablespoon of mild liquid dish soap to form a thick paste. Depending on how much cleaning is needed, ensure your mix ratios are; one part hydrogen peroxide to two parts baking soda.
Apply the paste on the grout lines and tile surfaces. Let the paste do its magic for about 20 minutes.
Scrub the affected areas with a brush or sponge, then rinse them with hot water. Wipe the space dry with a microfiber cloth.
6. Washing Soda
While baking soda and washing soda might sound similar, they are very different but effective natural cleaners. Washing soda or soda ash refers to sodium carbonate which is a caustic base while baking soda refers to sodium bicarbonate, a mild base.
Ideally, most of what grime build-up is acidic and thus necessitating an alkaline cleaner to do the job. Washing soda is more effective than baking soda and highly suitable for fighting deeply set stains and grease.
That said, avoid mixing it with acidic cleaners such as white vinegar as it only neutralizes its alkaline-cleansing power.
Washing soda is a naturally occurring substance that can be obtained from the ashes of sodium-rich plants. However, you can make it at home with baking soda.
Simply preheat your oven to 400 degrees Fahrenheit, put some baking soda on a shallow baking pan, and bake it for an hour. Stir up the powder occasionally for an even bake. Washing soda should appear grainy, yellowish, less clumpy, and dull.
Store the powder in an airtight jar, label it accordingly and keep it out of reach of pets and children.
When cleaning your toilet tiles, mix half a cup of washing soda per gallon of warm water in a bucket. Then, scrub the tile surfaces and grout lines with a brush or scouring sponge. Rinse the surface and wipe it dry.
What You Need
- Washing soda
- Hot water
- Liquid soap
- Options: Hydrogen Peroxide
Washing Soda and Soap
In a bucket, mix half a cup of washing soda and one tablespoon of liquid soap per gallon of hot or warm water.
Apply the solution liberally on the tiles and grout, and let sit for a couple of minutes. Scrub the affected regions with a brush, rinse thoroughly and wipe the surface dry.
Washing Soda and Hydrogen Peroxide
Mix equal parts of washing soda and hydrogen peroxide to form a thick paste. The washing soda enhances the sticking power of the hydrogen peroxide for the more effective removal of stubborn stains, grime, and mold.
Apply the paste to the grout lines and stained sections and let it sit for half an hour. Scrub the area with a brush and rinse the surface well until clean.
Disclaimer: Washing soda is a highly alkaline substance and should be handled with a lot of care. Always wear protective gloves when dealing with the substance to avoid possible skin irritations. Additionally, don’t use it on treated wood surfaces.
7. Lemon Juice
Like other acidic cleaners, lemon juice is a natural stain remover perfect for getting rid of water stains, soap scum, mold, and mildew.
Lemon juice contains a mild organic acid called citric acid, a D-limonene compound, and lemon oil. The citric acid helps dissolve hard water spots and water films while the D-limonene compound acts as a powerful solvent and degreaser.
Moreover, lemon juice has an uplifting “fresh” fragrance and can be used as a mild antibacterial disinfectant.
Fill an empty spray bottle with freshly squeezed lemon juice and spray it onto the toilet tiles and grout. Leave it to sit for a few minutes then wipe the surface clean with a damp cloth or sponge.
Alternatively, you can use half a lemon sprinkled with salt to scour away tougher stains. Remember to squeeze the lemon as you go to release the juice onto the affected areas. You can swap the salt with baking soda for the scouring action.
However, mixing baking soda with lemon juice might neutralize the effectiveness of the latter.
Yet another method to clean with lemon juice includes mixing it with vinegar or cream of tartar. Though vinegar is a solid natural cleanser, its strong scent can be off-putting to some people. Adding lemon juice to your vinegar cleaning solution is a good way to solve this issue.
Cream of tartar and lemon juice makes for a naturally whitening cleanser perfect for lightening grout and removing surface stains.
What You Need
- Lemon juice or lemon peels
- Options: cream of tartar and white vinegar
Lemon Juice and Cream of Tartar
Mix two tablespoons of cream of tartar with the lemon juice– just enough to make a runny paste.
Apply the paste to your tiles and grout, then scrub away the stains with a stiff-bristled brush. Rinse and wipe the surface dry
Lemon Peels and Vinegar
Collect the lemon peels and fill them halfway in a jar. You can swap the lemon peels with peels from other citrus fruits such as oranges, limes, and grapefruits.
Heat white vinegar in a large glass measuring cup or beaker and pour it over the lemon peels. Store the jar in a cool dark place. Allow the solution to sit for over 24 hours or longer to deepen the lemon fragrance.
Strain the lemon peels out and discard them into the trash can.
Use the scented vinegar cleaner to clean your bathroom tiles as previously explained. Once done, always store the solution in a cool dark place.
Disclaimer: Lemon juice is naturally acidic and therefore it might damage your natural stone tiles.
8. Borax
Borax or sodium borate is a naturally occurring mineral found in plants and soil. It is the best alternative to baking soda and works on most types of tiles. Borax cleaning solutions can be used to disinfect, deodorize, and remove stains from bathroom floors.
This powdery substance can be used to formulate cleaning pastes, sprays, and scrubs. You can make it into a paste with water or lemon juice and even mix it with hydrogen peroxide or baking soda for effective cleaning.
In its powdery form, dip a damp cloth into a container of borax powder and scrub the tiles and grouts until clean. Finish by rinsing and wiping the surface dry.
What You Need
- Borax
- Hot water
- Options: Lemon juice, white vinegar, hydrogen peroxide, baking soda, and coarse salt.
Borax Cleaning Solution
In a bucket, combine half a cup of borax with two gallons of warm or hot water. Apply the solution with a mop or sponge.
Though not necessary, rinse and wipe dry the surface. Alternatively, you can make a borax paste using warm water or lemon juice. Then, use the paste and a brush to scrub away any stains or mold build-up.
Borax and Hydrogen Peroxide
Mix up a paste of borax using warm water and scrub it onto the tiles and grout. Let it sit for about four to five hours.
Using a cloth or sponge, apply the hydrogen peroxide onto the tiles over the borax paste and let it sit for at least two hours. Scrub the affected areas, if necessary, and rinse the residue thoroughly with warm water.
Lastly, wipe the tiles dry with a microfiber towel or leave the surface to air dry.
Borax and Baking Soda
Mix equal parts of borax and baking soda with hot water to form a thick paste. Add water if the paste becomes too thick or non-malleable. For extra scouring power, you may add a cup or less of coarse salt.
Slather the paste onto the grout lines and stained tile surfaces. Allow it to sit for a few minutes then scrub with a brush.
Use white vinegar in succession if any residues remain. Otherwise, rinse and wipe the surface dry.
9. Hydrogen Peroxide
Often the go-to option for sanitizing cuts and wounds, hydrogen peroxide doubles as a superb whitening agent and cleanser. It helps remove mold and mildew and even get rid of the most stubborn stains on your toilet tiles.
Hydrogen peroxide is a non-toxic, eco-friendly alternative to bleach that breaks down into oxygen and water. Unlike chlorine bleach, hydrogen peroxide is gentler on most types of tiles and still effective at lifting away stains.
What You Need
- Hydrogen peroxide
- Hot water
- Optional: lemon juice and liquid dish soap
Instructions
Mix equal amounts of hydrogen peroxide and water in a spray bottle. Add a few tablespoons of liquid dish soap and lemon juice for a more effective cleaning process. The lemon juice adds a fresh lemony fragrance and further helps break down grime and scum build-up.
Next, spray it over the grout and tiles, let it sit for a while.
Wipe the surface with a sponge or cloth or scrub as needed. Rinse with clean water until clean, then wipe dry with a microfiber cloth.
Disclaimer: Hydrogen peroxide may cause skin and eye irritations so be sure to wear protective gloves and a face mask when handling it.
10. Essential Oils
While they may not be the active ingredient to your natural tile cleaners, essential oils are a good complement to most homemade cleaning solutions.
Most essential oils are naturally antifungal, antibacterial, and antiviral, which comes in handy in removing popular microbes from most types of floors. If properly diluted, the essential oils can be safely used on most types of tiles including natural stone tiles.
Instead of the nauseating bleach and cleaner smells, organic cleaners infused with essential oils double as air fresheners for your bathroom.
When making any of the cleaning solutions mentioned above, be sure to mix in a few drops of your favorite essential oils. Below are some good options to try with your organic cleaning solutions:
- Tea tree,
- Peppermint,
- Basil,
- Lavender,
- Eucalyptus,
- Lemongrass,
- Chamomile,
- Citrus-based oils such as sweet orange, bergamot, Citronella, lime, tangerine, and lemon.
To Conclude
Scrubbing away dirt, grime, soap scum, mold, and mildew from the toilet tiles is a chore most people don’t look forward to. The work is often backbreaking and tedious, especially if not frequently done. Not to mention the many risks posed by typical bathroom tile cleaners.
We hope the above recipes and information comes to your aid when figuring out which organic cleaning solution works for you. Remember to clean your toilet tiles regularly to avoid grime build-up and nasty odors.