
How to Fix Broken Toilet Flash Handle
A functional toilet is essential for everyday comfort, and a broken flush handle can disrupt the smooth operation of this important home fixture. Fortunately, fixing a broken toilet flush handle is a manageable task that doesn’t require extensive plumbing expertise. With a few basic tools and a straightforward process, you can swiftly restore the functionality of your toilet without the need for professional assistance.
This article will walk you through a step-by-step process to fixing a broken toilet flush handle. Whether it's a cracked handle, a loose connection, or an utterly non-operational mechanism, this guide aims to empower you with the know-how to tackle this common household issue.
By following these simple instructions and investing a short amount of time, you can effortlessly swap out the broken handle with a new one, ensuring your toilet operates smoothly and efficiently once again. So, let’s dive in and get your toilet flushing back.
Replacing a broken toilet flush handle is a fairly straightforward task. Here's a step-by-step guide:
Tools You Might Need:
Adjustable wrench or pliers
New toilet flush handle assembly
Steps:
Purchase the Replacement Handle
When you need to replace the flush handle of your toilet, it is important to ensure that you purchase an assembly that is compatible with your toilet's type and model. You can find these assemblies in a hardware store or home improvement center. Make sure to check your existing handle's design and the toilet's model number before heading to the store to ensure you purchase the right one. Once you have found the right assembly, follow the manufacturer's instructions to install it correctly.
Turn off the Water
To locate the water supply valve, look behind or near the toilet. The valve is typically a lever or knob that controls the flow of water to the toilet. Turn the valve clockwise to shut off the water supply. Once the valve is turned off, you can flush the toilet to remove most of the water from the tank. This will make it easier to perform any necessary repairs or maintenance on the toilet without risking water damage.
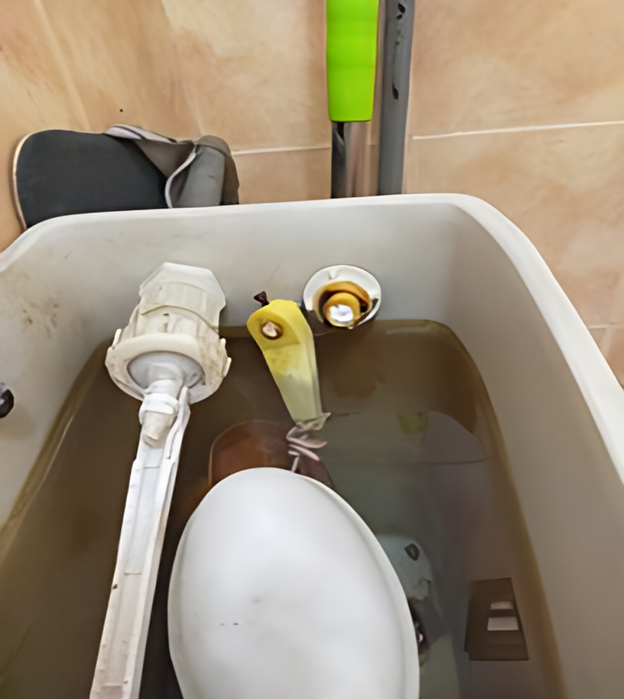
Open the Toilet Tank Lid
To access the toilet flush handle, you need to lift the lid off the toilet tank. To do this, first, locate the lid on top of the toilet tank. Then, hold the lid securely with both hands and lift it straight up. Be careful not to apply too much force or lift it too quickly as the lid may be heavy and might slip out of your hands. Once you have successfully lifted the lid, set it aside in a safe place where it won't fall or break.
Remove the Broken Handle
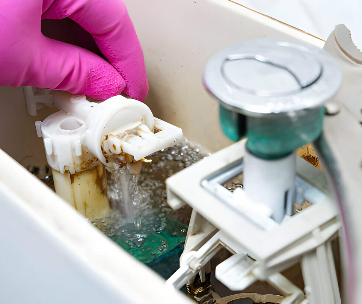
As you peer into the tank, you will notice a handle that is attached to a rod or chain. Typically, the handle assembly is secured to the tank with a nut or screw that is located on the inside of the tank. To remove the handle assembly, you will need to use a wrench or pliers to unscrew or unbolt it from the inside of the tank. Once the nut or screw is removed, you can gently pull the handle assembly out of the tank. Be sure to keep the nut or screw in a safe place, so you can easily reattach the handle assembly later.
If you encounter any resistance while removing the handle assembly, you may need to apply some gentle pressure or use a lubricant to help loosen it. Take care not to damage any of the components inside the tank while you are working, and be sure to follow all safety guidelines to prevent injury.
Detach the Chain or Rod
Once the handle is removed, you'll see a chain or rod connecting it to the toilet tank's flapper valve. To detach the chain or rod, unhook it from the arm of the valve. Be sure to note the length of the chain or rod, as you may need to adjust it when installing the new handle.
Install the New Handle
Once you have removed the old handle, take the new handle assembly and attach the chain or rod like it was connected to the old handle. Carefully insert the new handle through the hole in the tank and ensure it is correctly aligned with the lever arm inside the tank. Once it is in the correct position, secure it with the nut or screw provided with the new handle assembly. Tighten it with a wrench or pliers until it is snug but not over-tightened, as this could cause damage to the handle assembly or the tank lever. Finally, test the handle by flushing the toilet a few times to ensure it works correctly and without any issues.
Adjust Chain Length (If needed)
To ensure that your toilet flushes smoothly, check the chain that connects the toilet flush handle to the flapper or flush valve. The chain should have a little bit of slack, but not too much. If the chain is too tight, it can prevent the flapper from closing properly, resulting in a constantly running toilet. On the other hand, if the chain is too loose, it can get caught under the flapper and prevent it from opening fully, leading to a weak flush.
To adjust the chain length, simply turn off the water supply to the toilet, remove the lid from the tank, and adjust the chain as needed. Once you've made the necessary adjustments, turn the water supply back on and test the flush to ensure that it's working smoothly.
Test the Flush
To make sure that the toilet is functioning properly, it is recommended to flush it a few times. This will allow you to check if the handle is working correctly and if the flush mechanism is operating as, it should. If you notice any issues with the handle or the mechanism, you may need to have them repaired or replaced to prevent future problems. By taking this simple step, you can ensure that your toilet works as it should and avoid any potential inconvenience or expense down the line.
Return the Tank Lid
Once you have verified that the toilet handle is functioning correctly by flushing the toilet a few times, please ensure the handle is securely attached to the toilet tank. After that, gently put the toilet lid back onto the tank, ensuring it is aligned and seated correctly. Be careful not to drop the lid or damage any of the components inside the tank.
Congratulations on successfully replacing the broken toilet flush handle! You've taken an important step in ensuring your bathroom's functionality. It's important to note that if you encounter any issues or if the problem persists after replacement, it might be wise to consider consulting a professional plumber. They have the expertise and tools necessary to diagnose and address any underlying problems that may have caused the handle to break in the first place. By seeking their assistance, you can ensure that your toilet operates smoothly and efficiently for the long term.
Conclusion
In conclusion, replacing a broken toilet flush handle is a manageable task that can significantly improve the functionality and convenience of your toilet. By following the steps outlined above, you can confidently tackle this simple repair without needing professional assistance in most cases.
Choosing the correct replacement handle assembly tailored to your toilet model is crucial for a smooth installation. Additionally, taking the time to ensure the proper adjustment of the chain or rod connected to the handle contributes to the smooth operation of the flush mechanism.
Regular maintenance and prompt repairs of such components enhance your toilet's efficiency and prevent potential inconveniences caused by malfunctioning fixtures. With the simple steps, you can restore the functionality of your toilet flush handle, contributing to the overall efficiency and comfort of your toilet experience.