How to Fix a Condensed Toilet Tank
Dealing with a condensed toilet tank can be a frustrating and perplexing issue for homeowners. The accumulation of moisture on the exterior of the tank can result from various factors, including temperature differentials, cracks, or leaks within the tank itself. Not only does this condensation create an unsightly appearance, but it may also signal underlying problems that require attention to prevent further damage.
If you're dealing with a condensed toilet tank, it's important to address any issues related to moisture buildup, cracks, or leaks that may be causing the condensation. To diagnose the problem, start by inspecting the toilet tank for any signs of visible moisture on its exterior surface. If there's moisture present, it's likely that the tank is experiencing condensation issues.
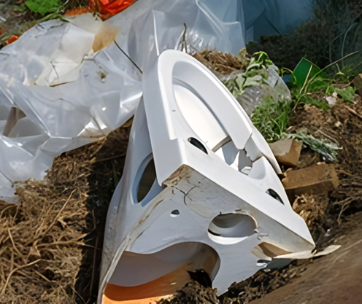
Next, locate any cracks or leaks in the toilet tank that may contribute to the problem. Common areas to check include the tank's base, the bolts that secure the tank to the bowl, and the tank's overflow tube. If you notice any cracks or leaks, you must repair or replace these parts to prevent further moisture buildup and condensation.
Insulation may sometimes be necessary to prevent moisture buildup and condensation in the toilet tank. You can purchase foam insulation kits designed specifically for toilet tanks to help keep the tank dry and efficient.
Fixing a condensed toilet tank requires a thorough diagnosis of the problem, followed by appropriate repairs or insulation measures. By following the steps outlined in this guide, you can restore the proper functioning of your toilet tank and ensure that it remains dry and efficient over time.
Step-by-step guide on fixing a condensed toilet tank
1. Identify the Problem
If you notice any condensation on your toilet tank, there could be a couple of possible causes. It could be due to a difference in temperature between the tank and the ambient temperature of the toilet, leading to condensation forming on the outside of the tank.
Alternatively, it could indicate a more serious issue like a cracked or leaking tank. To determine the cause of the condensation, check if the tank is leaking or is simply due to temperature variation in the bathroom.
2. Turn Off Water
To turn off the water supply to your toilet, you need first to locate the valve responsible for controlling the water flow. This valve is usually situated near the toilet's base or on the water line that leads to it. Once you've found the valve, turn it clockwise until it is fully closed. This will effectively shut off your toilet's water supply, preventing further water from entering the tank or bowl.
3. Empty the Tank
To properly empty the toilet tank, first, locate the flush lever on the outside of the tank. Push the lever down to release the water from the tank into the bowl and flush away any waste. Once the water has drained from the tank, you may notice that some water remains. To remove this remaining water, use a clean sponge or towel to absorb it. Be sure to wring out the sponge or towel over a bucket or sink to avoid making a mess. Once all the water is removed, you can proceed with any necessary maintenance or repairs.
4. Inspect for Cracks or Leaks
Check the toilet tank for any cracks or leaks, as they can lead to water damage and costly repairs. If you notice that the toilet tank is condensed due to temperature variation, there are a few steps you can take to address the issue.
First, wiping down the toilet tank with a dry cloth can help remove any excess moisture. Additionally, adjusting the temperature in the room or using insulation can help regulate the temperature and prevent condensation from forming.
5. Repairing a Crack or Leak
If you have noticed small cracks on your toilet tank, it is important to address the issue before it worsens. While replacing the entire tank may be the best long-term solution, using epoxy or waterproof sealant designed specifically for plumbing repairs can provide a temporary fix and prevent any further damage.
Epoxy is a type of adhesive that hardens into a strong and durable material upon application. The waterproof sealant, on the other hand, is specifically designed to withstand wet environments and can be applied to seal the crack and prevent water leakage. It is important to note that these solutions are temporary and should not be considered a permanent fix. It is recommended to consult with a professional plumber to assess the damage and determine the best course of action.
6. Insulation
If you notice that your toilet tank is gathering condensation, it could be due to differences in temperature. In such a case, insulating the tank can help prevent further condensation from occurring. Insulation works by reducing the temperature difference between the inside and outside of the tank, which in turn reduces the risk of moisture buildup.
You can find specialized foam insulation kits for toilet tanks at most hardware stores. These kits are easy to install and come with detailed instructions, so you don't need to be a DIY expert to get the job done. By insulating your toilet tank, you can not only prevent condensation but also save water and reduce your energy bills.
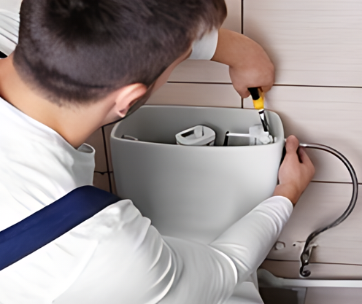
7. Reassemble
Once you have completed the repair or insulation on the toilet tank, reassemble the tank carefully to ensure that it is functioning properly. Begin by placing the tank back onto the bowl and tightening the bolts that hold it in place. Then, connect the water supply line to the bottom of the tank, making sure to tighten the nut securely.
Next, it is time to turn the water supply back on. Before doing so, double-check that all parts are properly connected and aligned. Once you have confirmed this, slowly turn on the water supply and watch for any leaks. If you notice any leaks, turn off the water supply and carefully re-tighten the connections.
After confirming that there are no leaks, it is time to test the functionality of the toilet. Flush it a few times to ensure that it is filling and emptying properly. If you notice any issues, it may be necessary to make further adjustments or repairs. Otherwise, congratulations! You have successfully repaired or insulated your toilet tank.
8. Monitor
Once you have repaired or insulated your toilet tank, keep an eye on it for a while. This will allow you to ensure that the repair or insulation has been effective and that there are no further issues.
It is worth noting that a simple fix might not always be enough to address the problem at hand. If you notice the issue repeating itself, it might be best to consult a plumber or a professional for further assistance. They will be able to provide you with a more in-depth analysis of the problem and recommend the best course of action to take.
By taking these steps, you can ensure that your toilet tank is in good working condition and avoid any potential problems in the future.
Conclusion
In fine, resolving a condensed toilet tank issue requires a systematic approach to identify the cause and implement effective solutions. Whether the condensation stems from temperature differentials, cracks, or leaks, prompt action is key to preventing further damage and restoring optimal functionality.
By following the steps outlined in this guide, including assessing the problem, conducting repairs, insulating where necessary, and monitoring for any recurring issues, you can effectively tackle the condensed toilet tank problem.
Remember, seeking professional assistance is advisable for extensive damage or situations beyond your expertise. Regular maintenance and vigilance can also help prevent future occurrences of condensation, ensuring a dry and well-functioning toilet tank for the long term.